
That’s when, two years ago, my team and I began installing EV charger throughout South Carolina. I thought, “It’s easy to just add on to our general electrical work.” Just wire it together, and a box will be attached. I was wrong. My experience with that is what schooled me in nearly every field of what to do and not to do.
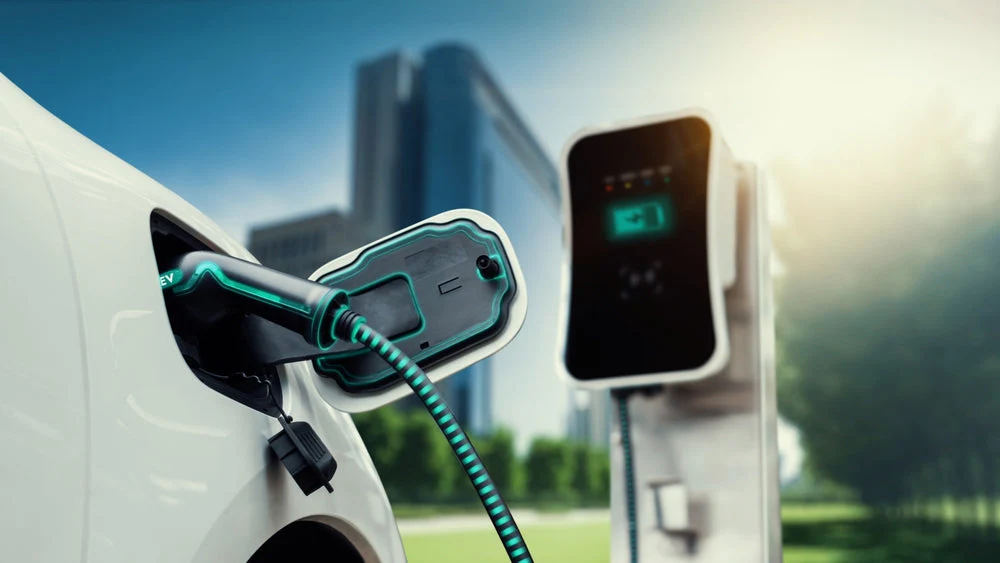
I intend to make people aware of the work required to have an EV charger installed properly for home use. As I do that, I’m making my points here. Not so much the marketing thing, but the actual nitty-gritty process. This includes the errors we made in the beginning and the tactics we use now. If you’re about to install a Level 2 charging solution at home, you should know what to expect.
Why are South Carolina Homes different?
The architecture of each state has some distinct qualities that apply specifically to each geographic area. South Carolina is no different. Many of the houses that we work on, particularly in the Upstate & Midlands, were constructed long before anyone ever thought an overnight “plug-in” would be needed for any vehicle. That involves older electrical panels, aluminum wiring in homes built in the 60s and 70s, and garages not connected to the main grid that are only wired for a porch light.
The design of your house is not the only element that makes a big difference. However, the structure of your house is by no means the only aspect that makes a big difference for anyone. The service area may overlap that of Duke Energy Carolinas (Upstate), Dominion Energy South Carolina (Lowcountry, which includes Charleston and Midlands, including Columbia), Duke Energy Progress (boundaries in the eastern half of the state, including Florence and Myrtle Beach), or a local cooperative such as Blue Ridge Electric.
This isn’t a simple matter of trivia, since it will impact not only the rebates you can qualify for, but also how installation paperwork is filed.
Stage One: A Site Visit will be Conducted
You’re not fooling anyone. During our initial year, we at times executed site visits that were inadequate and simply speculative (as far as value) on jobs based on images that a homeowner would send us. That was a mistake. The one situation that comes to mind is with a customer in Greenville who had an older home that already had a 100-amp service panel outfitted for their central air conditioning, electric water heater, and pool pump. It was not until we arrived on-site with the charger in tow that we noticed one of those had been missed.
We were forced to suspend activities, reevaluate, and come back a week later with a new plan to move ahead with a complete panel upgrade. Obviously, the homeowner was unhappy and frustrated with us. It was a turning point for me.
At this point, all quotes start with an in-person inspection of a panel conducted by us to verify that:
- The panel’s total amperage and available capacity (total vs used)
- The condition of wiring, especially in homes built before 1980
- The distance between the panel and charger position (which influences cost & technique)
- The ability to use a garage/driveway route to create an unobstructed, safe conduit path
Stage Two: Identifying the Size of the Charger for the Climate
South Carolina summers are brutal, and it’s a big deal when it comes time to select equipment. Several chargers are installed outside, either on walls or on a carport without any cover, and not all chargers are equally heat and humidity-tolerant.
For outdoor use, we like units that are NEMA 4 weatherproof. The Grizzl-E Classic is a rugged, basic unit for customers with more budget considerations if they don’t require a lot of monitoring options. On the other hand, the Emporia Smart 48A option is well known among those who want Wi-Fi connectivity and energy monitoring.
It can be beneficial to keep monitoring features in mind if your utility offers an off-peak billing rate structure. The price per kilowatt-hour (kWh) for Duke Energy is approximately 13.7 cents, while Dominion Energy South Carolina’s rate is 14.2 cents.
Your power expenses might be significantly reduced if you have an off-peak charging schedule, especially overnight. If you can take advantage of this, the charger you install can also save a lot of money.
There is no better way to learn than through hands-on experience. The following are key methods we use in all projects:
- A circuit for each Level 2 charger: Each Level 2 charger we install is its own separate 240-volt circuit, no exceptions. If it’s the 80% rule, then we are normally using a 40-amp charger and a 50-amp circuit. We’ve even seen installations where handypersons plugged into an existing dryer outlet. Don’t do this. It is a fire hazard.
- Garage installations of conduit require strategic planning. Running conduit through the attic or up a wall stud bay is generally not difficult. But in detached houses or crawl spaces, we map the entire route to avoid damaging drywall.
- Older South Carolina houses have structural surprises such as remnants of old knob-and-tube wiring, hidden HVAC duct, and/or unmapped plumbing.
- Proper grounding and bonding: This may sound obvious; however, it is a very common mistake we have observed in other contractors’ projects. A misconnected charger can lead to nuisance faults and/or real hazards.
- Ensure a perfect fit: Chargers are installed based on the position of the charging port in the customer’s vehicle, not at a generic 48″ height. A few minutes of planning can help the cable fit properly and avoid stretching across the driveway, greatly extending its lifespan.
There’s a Mistake in the Permit: The Permit Shortcut
Early in the process, a customer requested that we not obtain a permit for the project because she did not want to spend the money or time. The one weak thing I have ever had is agreeing to things I don’t want to, so against my better judgment, we did it.
While the install itself was good, it was not until the homeowner sold the home about 2 years later and during a home inspection, that the electrical work came into question. This became a major issue at closing, and the lender required it to be fully permitted and corrected before closing.
That taught us one of the most important lessons in this business: pull the permit. Having a licensed South Carolina electrician and completing the proper documentation ensures the homeowner is protected for many years. Today, permitting is a standard part of every project we perform.
What About Tax Credits and Rebates?
More than anything else, homeowners ask about financial incentives. The rebate situation in South Carolina is a bit of a patchwork right now. Although there isn’t a nationwide EV charger rebate, many utilities have their own programs:
- Duke Energy: Customers who agree to charge during off-peak hours can participate in residential programs that give a $500 refund and a $13.87 monthly bill credit
- Blue Ridge Electric Cooperative: With proof of purchase and vehicle ownership, members are eligible for a refund toward Level 2 charger installation
- Greer CPW: Residential utility subsidies for Level 2 installations are also available to customers
30% of hardware and installation costs, up to $1,000, are covered by the Alternative Fuel Vehicle Refueling Property Credit at the federal level. Remember, this is a tax credit, which means it reduces your tax liability rather than providing upfront cash.
Our suggestion: verify your exact utility provider by checking your most recent power bill before purchasing equipment, then visit their website. Utility programs change frequently, so what was offered a year ago may not be the same today.
Because both utility rebates and federal tax credits (submitted via IRS Form 8911) require documentation, we keep all client receipts and installation records organized.
One Job That Stayed with Me: Before and After
One of my favorite installations was for a Colombian homeowner who had been using a standard 120-volt wall outlet to charge their vehicle.
Obtaining a full charge took nearly eleven hours.
To install a hardwired Level 2 charger in their garage, we had to spend half a day wiring a 50-amp circuit from their main panel through an accessible attic area.
Their overall charging time decreased to less than four hours after installation. The homeowner said the real advantage was peace of mind: after a long journey, they could arrive home late, plug in, and wake up each morning with a fully charged battery.
Concluding Remarks From Our Team
If there is one thing we want you to remember, it is that installing an EV charger is first and foremost a significant electrical project, followed by a convenience upgrade. Even though they are not the most visible parts of the work, the panel inspection, dedicated circuit, grounding, and permits are essential.
Over time, we’ve improved our process by learning from our mistakes. If you’re thinking about installing an EV charging station at home, check what your utility offers, hire a qualified electrician who does not take shortcuts, and avoid cutting corners.Your wallet, your car, and your home will thank you. If you have any questions about your home’s electrical setup, don’t hesitate to contact our team. We are happy to discuss what your installation will look like before you begin the project.